Step 1:- Open Android Studio. In the dropdown menu, click on Virtual Device Manager.

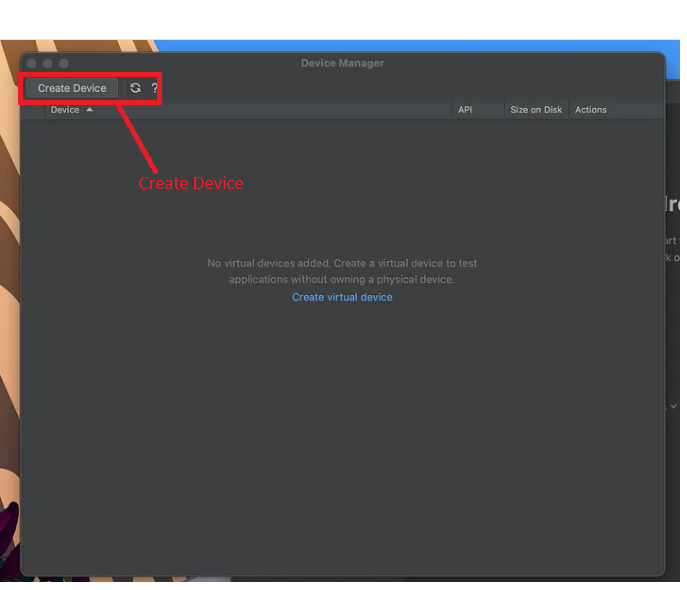
Instead of “Create Device,” click on “Add Device” in the top left corner of the Device Manager window.
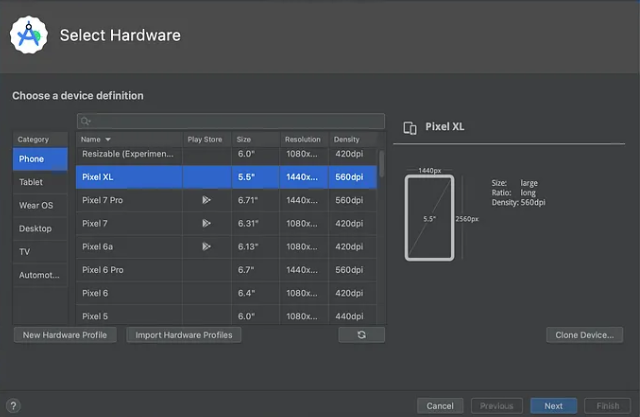
It’s advised to generate an AVD for each system image, but for the sake of simplicity, we’ll just create a single one. For a more detailed guide on creating AVDs, select “Pixel XL” or any other phone model that fits your requirements, then proceed by clicking “Next”.
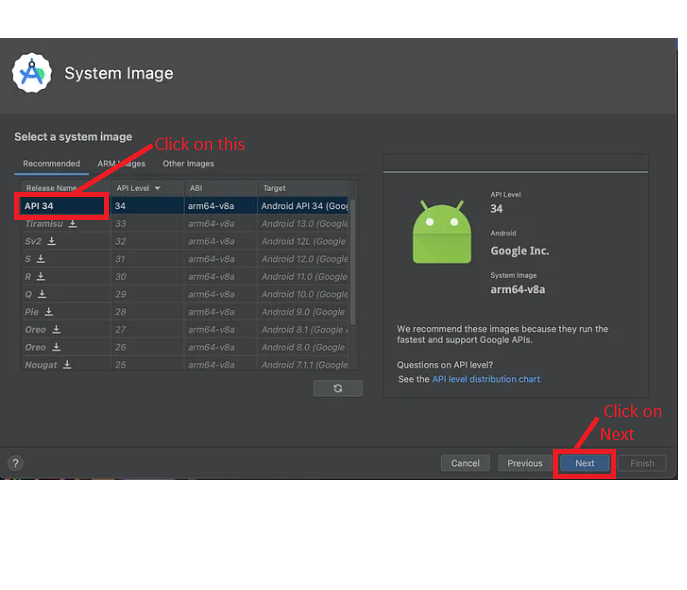
Following that, choose a hardware profile. For this instance, I’ll opt for “API 34”, then proceed by clicking “Next”.
Upon reaching the “Verify Configuration” window, adjust the AVD properties according to your preferences, then finalize by clicking “Finish”.
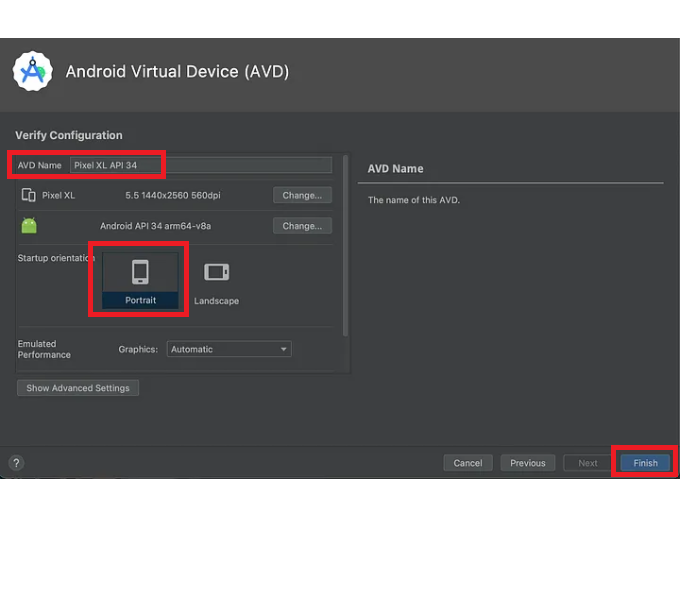
Fantastic! Your device has been successfully created.
Step 2:- Open Android studio
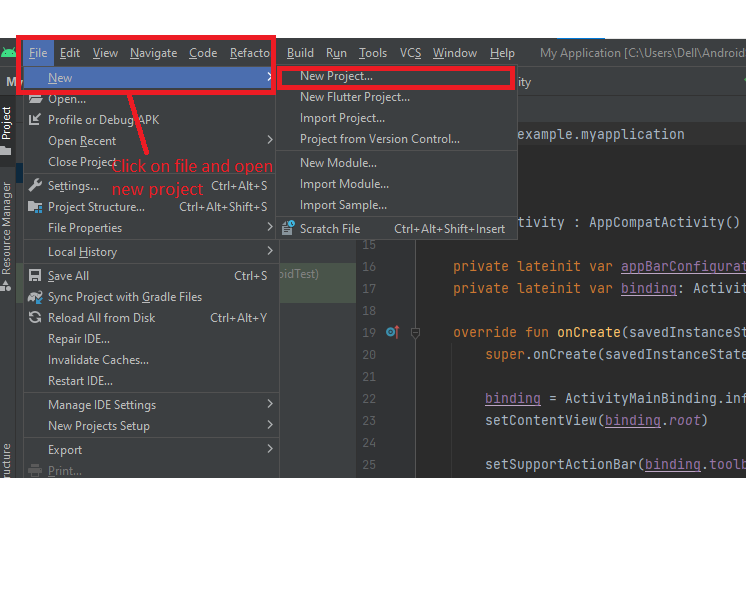
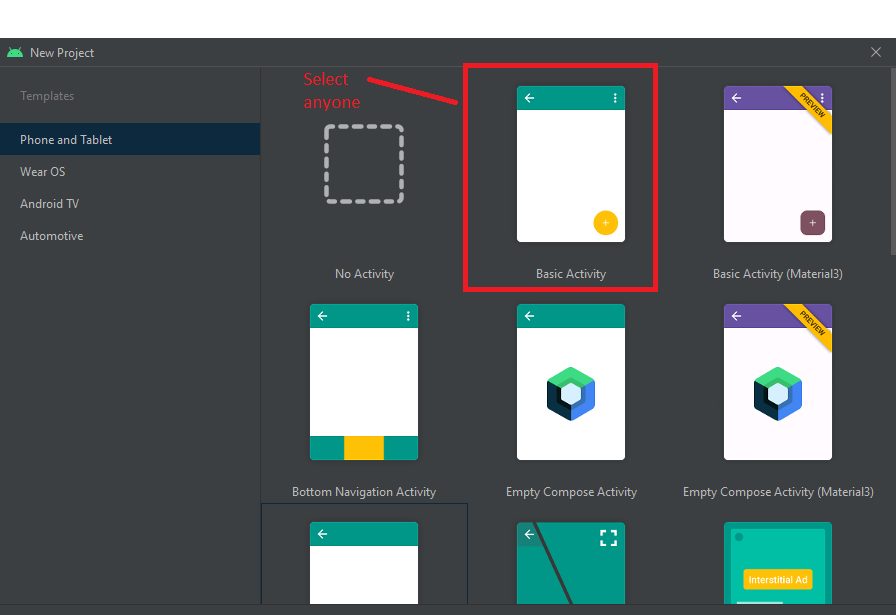
And last open one project
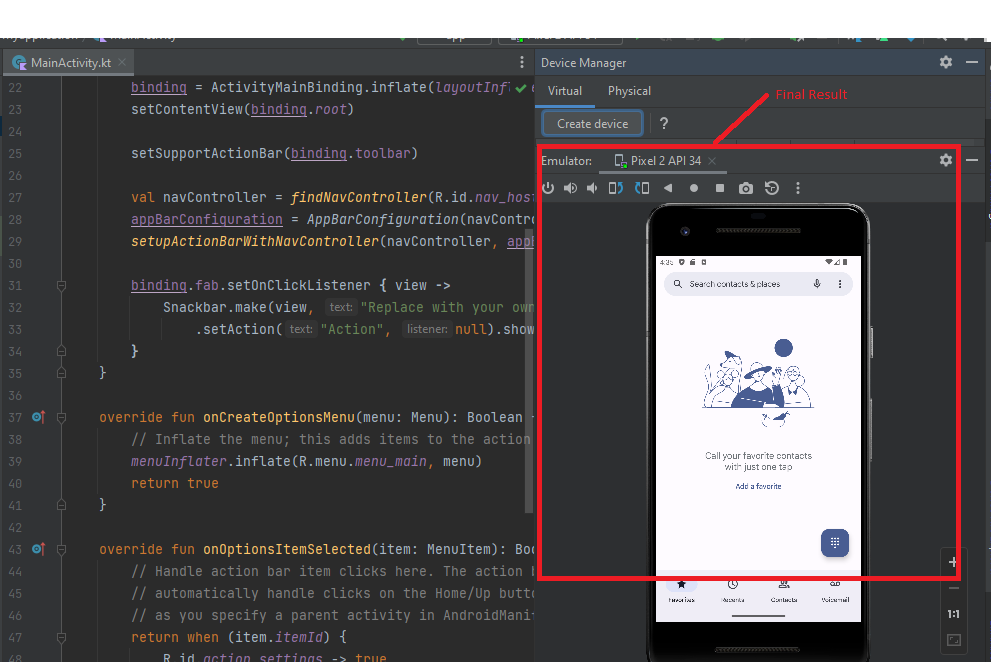
Output:-
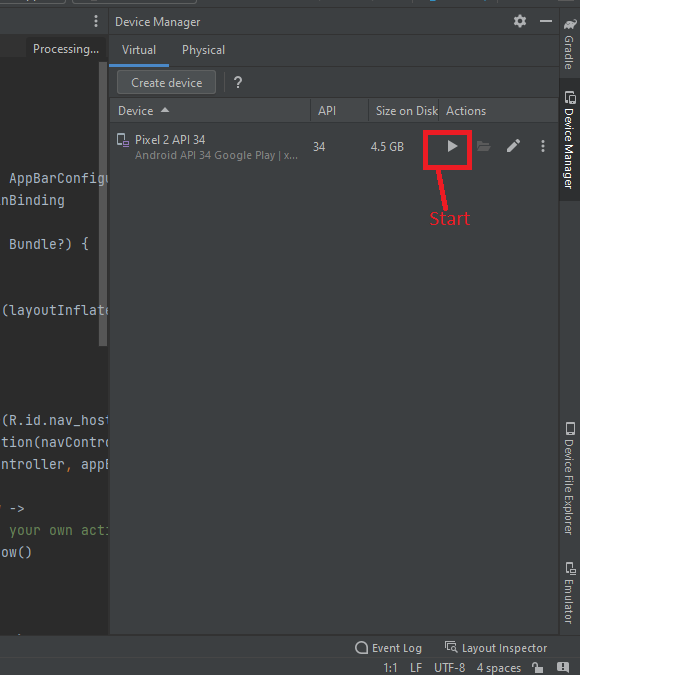
Run the Device
Hopefully, It will help you …!!!